Sharing Your System
Give family their own access
Want your partner, family or a housemate to have their own access to your system on their own phone? You can share it with them. You generate a QR code, they scan it, and they're in. There are two parts — a few taps on your phone, then a few on theirs.
These steps work for any device on your account — cameras, alarm or intercom. We've used the cameras as the example here, but it's the same for the others.
First, they need their own account
The person you're sharing with needs their own free Hik-Connect account before you start. If they haven't got one, our Hik-Connect account setup guide walks them through it in a few minutes.
On your phone: share the system
- 1
Open the device menu
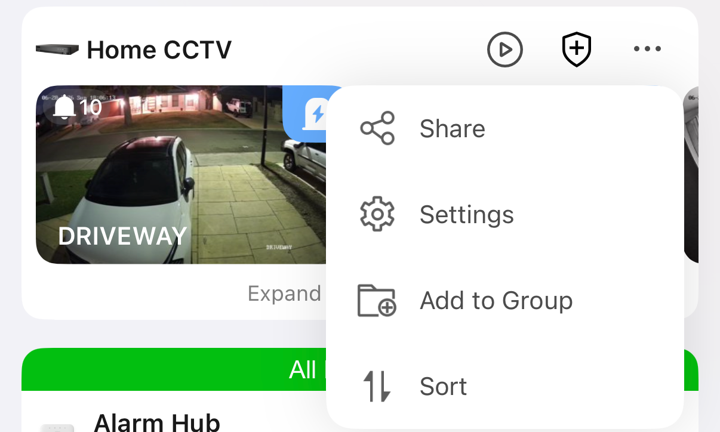
On the device you want to share, tap the three dots in the top-right corner, then tap Share.
- 2
Choose Share via QR Code
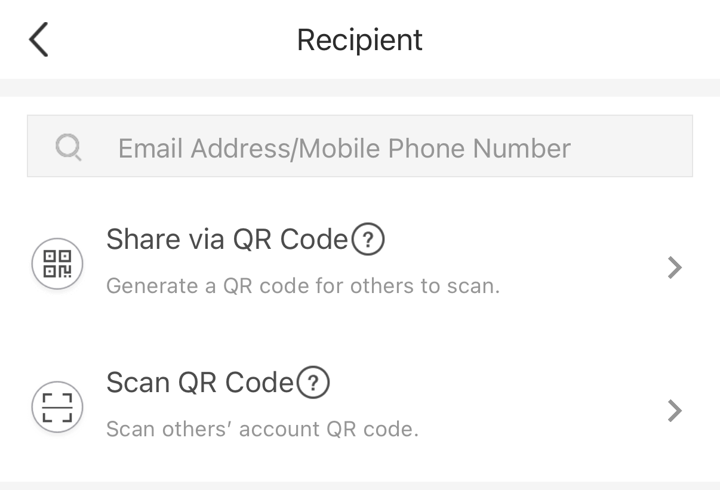
Tap Share via QR Code — this makes a code the other person scans to get access.
- 3
Choose what to share
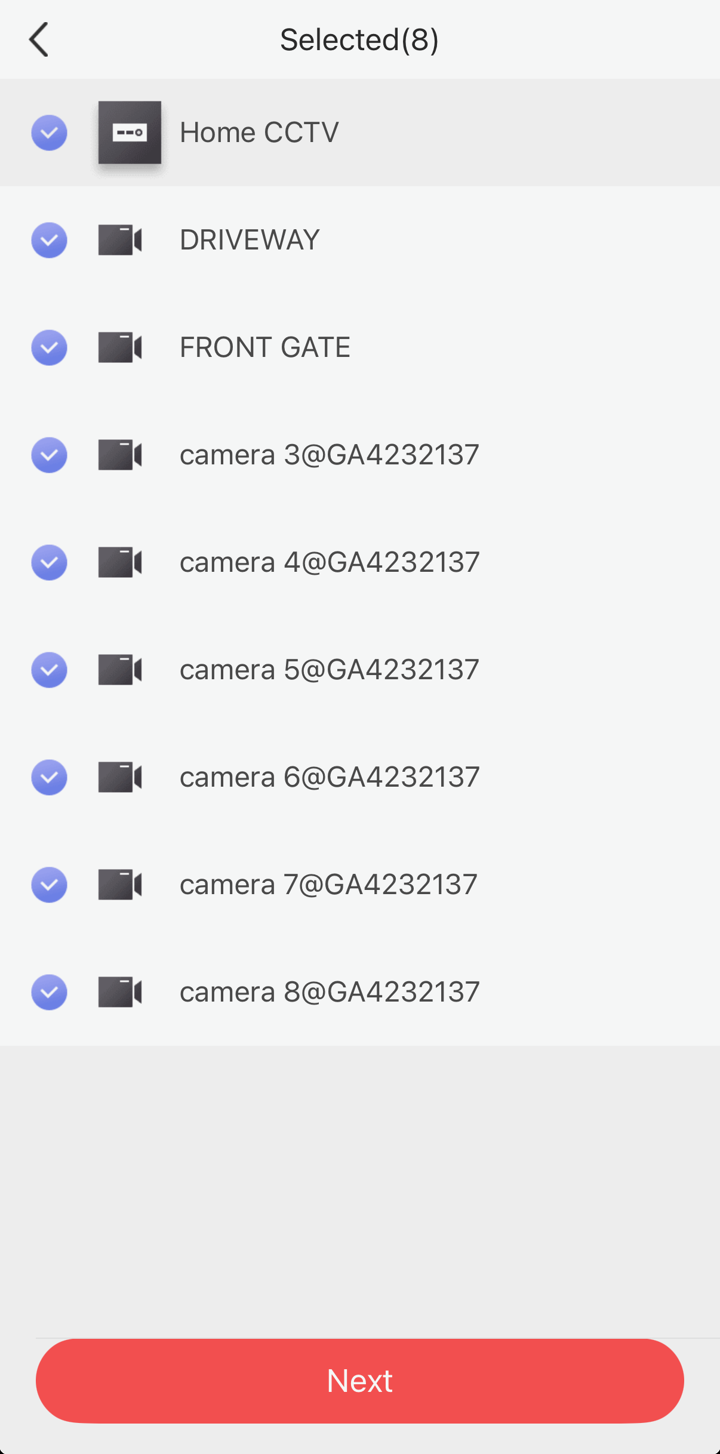
By default everything under that device is already ticked, so you're sharing the lot. Leave it as is (or untick anything you don't want to share) and tap Next.
- 4
Set the permissions
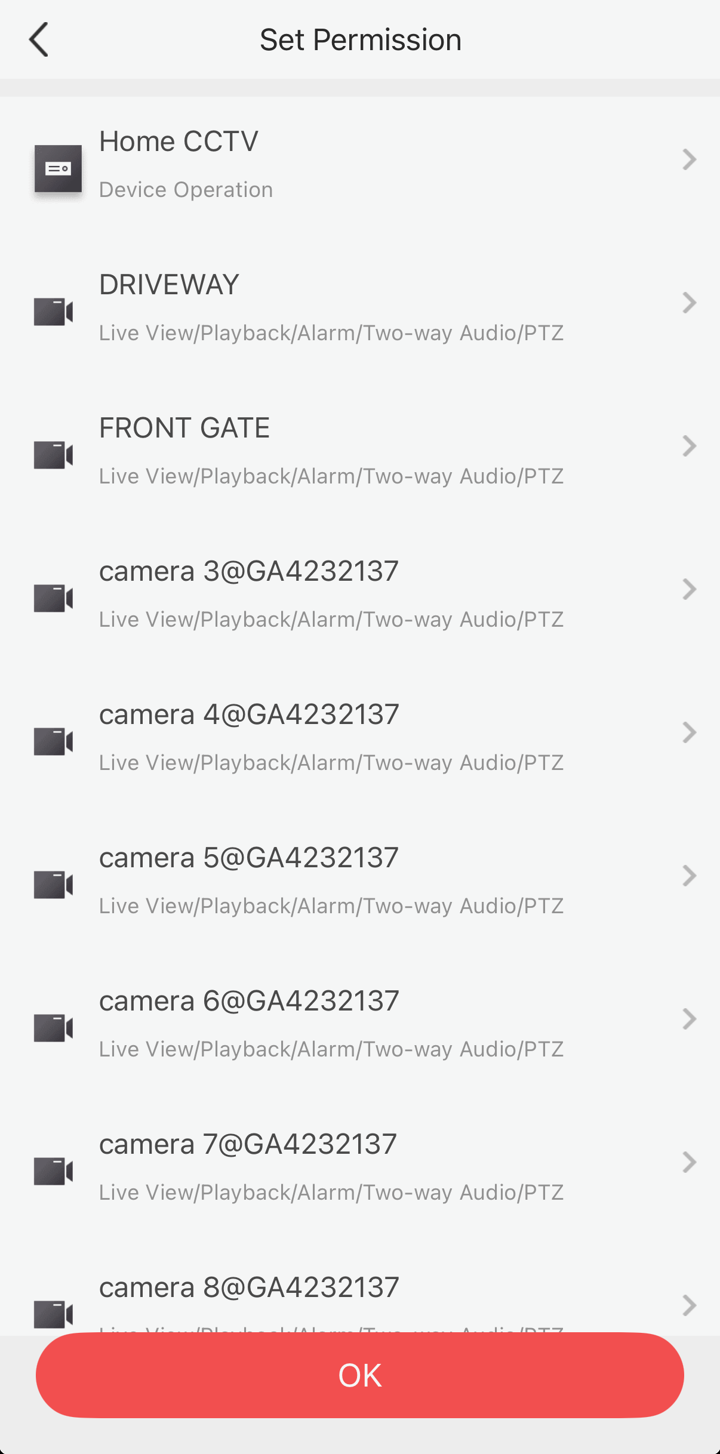
By default they get full access — live view, playback, alarm, two-way audio and PTZ. That's usually what you want for family, so just tap OK.
- 5
Show them the QR code
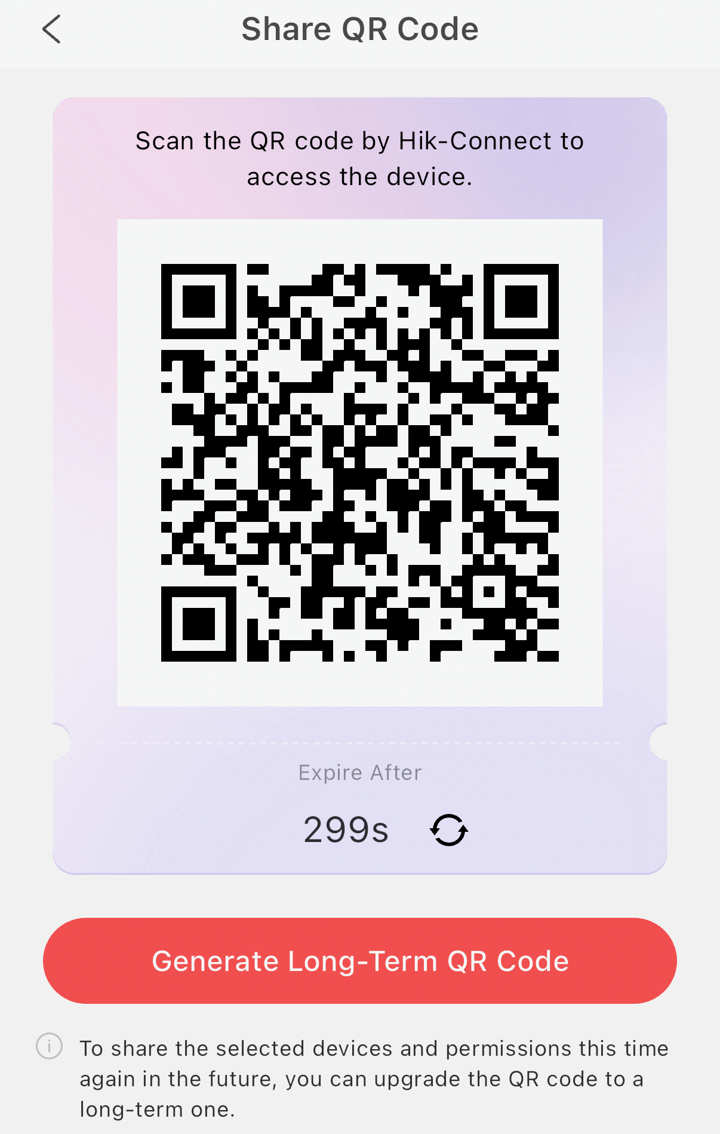
Your QR code appears — the other person scans this from their phone (next section). It expires after a few minutes, so have them ready. If you need one that lasts, tap Generate Long-Term QR Code.
On their phone: add the cameras
About the encryption password
Your footage is encrypted for privacy. During your install handover, we get you to photograph your system's verification code— that code is the encryption password. You'll need it at step 6 below. Keep it somewhere safe and only share it with people you're happy to give camera access to.
- 1
Add Device → Scan QR Code
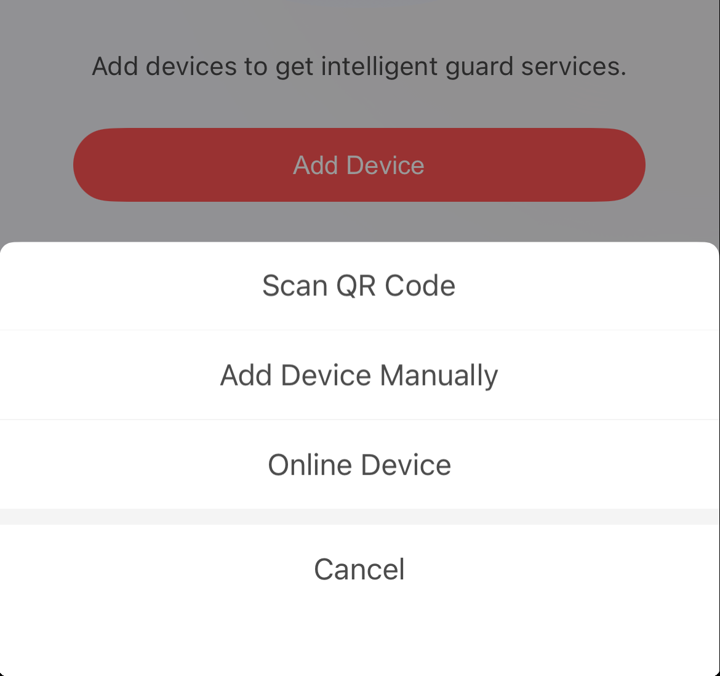
On their phone, tap Add Device, then choose Scan QR Code from the options.
- 2
Scan and accept
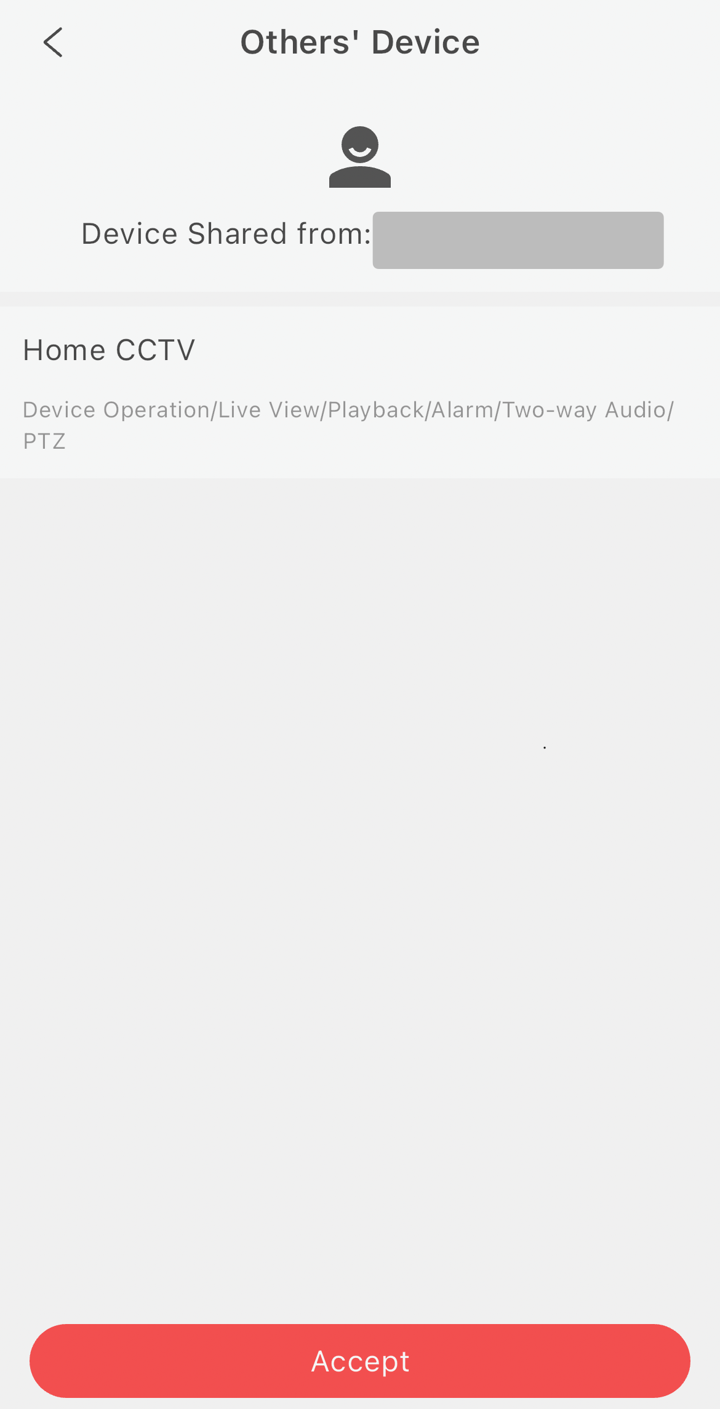
Point their camera at your QR code. They'll see it's shared from your email and which cameras are included — tap Accept.
- 3
Sharing accepted
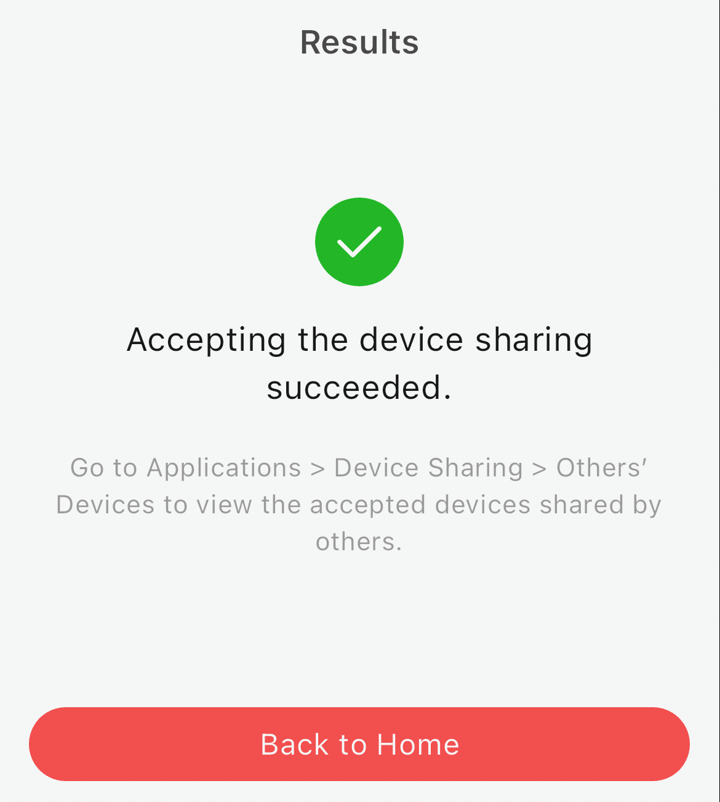
A tick confirms it worked. The cameras are now on their phone.
- 4
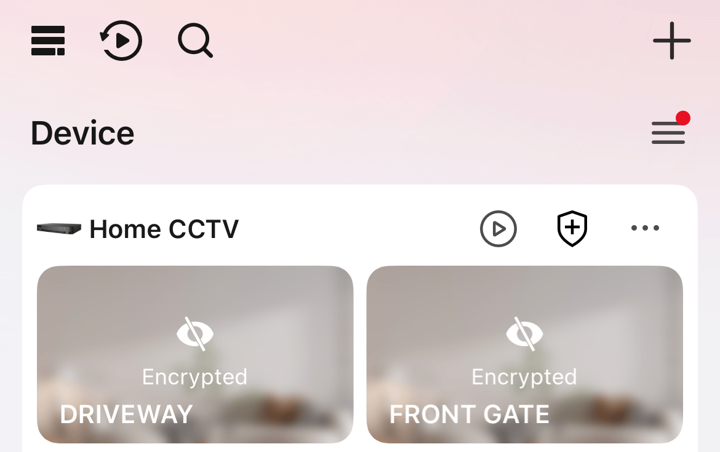
The cameras show as encrypted
At first the shared cameras show as Encrypted — the picture is locked until they enter the password one time.
- 5
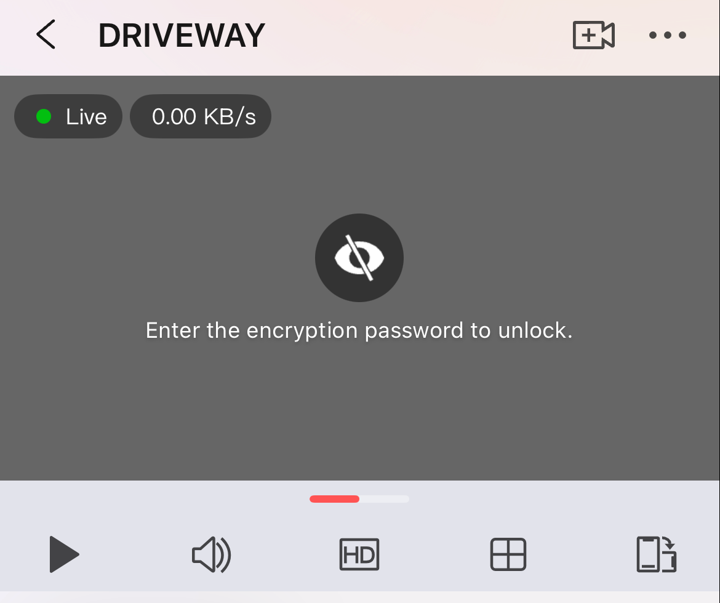
Tap a camera to unlock it
Open one of the cameras. It'll ask for the encryption password to unlock the picture.
- 6
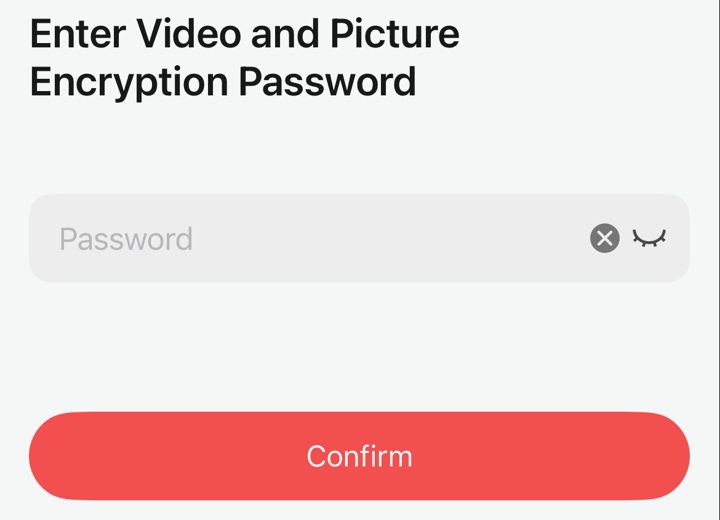
Enter the encryption password
Type in the verification code (see the note below), then tap Confirm.
- 7
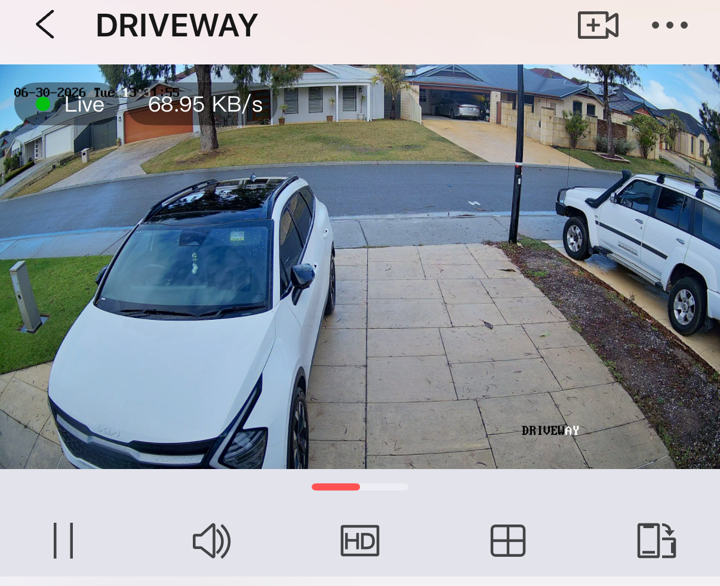
Done — the picture unlocks
The stream decrypts and the cameras play as normal. That's the system shared.
That's them set up.
They'll now have the cameras on their own phone with their own login. You can remove their access any time from the sharing settings on your phone.
Stuck sharing it?
Give us a call or send an email and we'll walk you through it.